VPN Server on Mac without OS X Server
Thu 28 Apr 2016, 19:01
I found this great tutorial on how to set up a VPN Server on your Mac, in my case a Mac Mini that I have running 24/7 for Plex, without paying $20 for OS X Server.
I successfully did it running regular OS X Yosemite 10.10.5.
The tutorial was a bit short in a few areas though so I’ll elaborate a bit:
Port forward
Forward these ports in your router to your Mac:
- UDP 500
- UDP 1701
- UDP 4500
Add a shared secret
This is not really a password, but it kinda is anyway. Just run this Terminal command and replace SHARED-SECRET-PHASE with what you want. Maybe even a long sentence?
sudo security add-generic-password -a com.apple.ppp.l2tp -s com.apple.net.racoon -T /usr/sbin/racoon -p "SHARED-SECRET-PHRASE" /Library/Keychains/System.keychain
Configuration
Download and save this file somewhere, and unzip. In it you will find com.apple.RemoteAccessServers.plist, modify it:
You need to modify the following lines with your own information:
Lines 19-20 under “OfferedServerAddresses”
These two lines should be changed to the DNS domains you want your VPN clients to use. In this example, I’m providing my local router (10.0.1.1) and a Google DNS domain as a secondary (8.8.4.4).
Lines 29-30 under “DestAddressRanges”
These two lines specify the start and end IP address range that will be given to clients when they login. In this example, my clients are given an IP address between 10.0.1.250 and 10.0.1.254. Ideally, you should choose a range that is outside of the range that your router will assign so that you avoid IP address conflicts. For example, my router is configured with a DHCP range of 10.0.1.2 to 10.0.249.
After modifying the file with your settings, run these commands:
sudo chmod 644 com.apple.RemoteAccessServers.plist
sudo chown root:wheel com.apple.RemoteAccessServers.plist
sudo cp com.apple.RemoteAccessServers.plist /Library/Preferences/SystemConfiguration/com.apple.RemoteAccessServers.plist
Creating launchd profile
Run sudo nano /Library/LaunchDaemons/com.apple.ppp.l2tp.plist and paste this in:
<?xml version=”1.0″ encoding=”UTF-8″?>
<!DOCTYPE plist PUBLIC “-//Apple//DTD PLIST 1.0//EN”
“http://www.apple.com/DTDs/PropertyList-1.0.dtd“>
<plist version=”1.0″>
<dict>
    <key>Label</key>
    <string>com.apple.ppp.l2tp</string>
    <key>ProgramArguments</key>
    <array>
        <string>/usr/sbin/vpnd</string>
        <string>-x</string>
        <string>-i</string>
        <string>com.apple.ppp.l2tp</string>
    </array>
    <key>OnDemand</key>
    <false/>
</dict>
</plist>
Hit CTRL X, Y and Enter to save.
Run it
Finally, to start it, use this command:
sudo launchctl load -w /Library/LaunchDaemons/com.apple.ppp.l2tp.plist
Note that this will also make it run on reboot.
Configuring your client to connect to it
On iPhone you will find VPN settings in Settings > General > VPN. Use these settings for new configuration:
- Type: L2TP
- Description: Whatever name you want
- Server: Public IP to your home. You should probably set up a dynamic DNS for this.
- Account: The username for the user on your Mac
- Password: Password for user on your Mac
- Secret: the secret phrase you configured earlier
After that, just enable it, try disconnecting from your wifi, and boom!
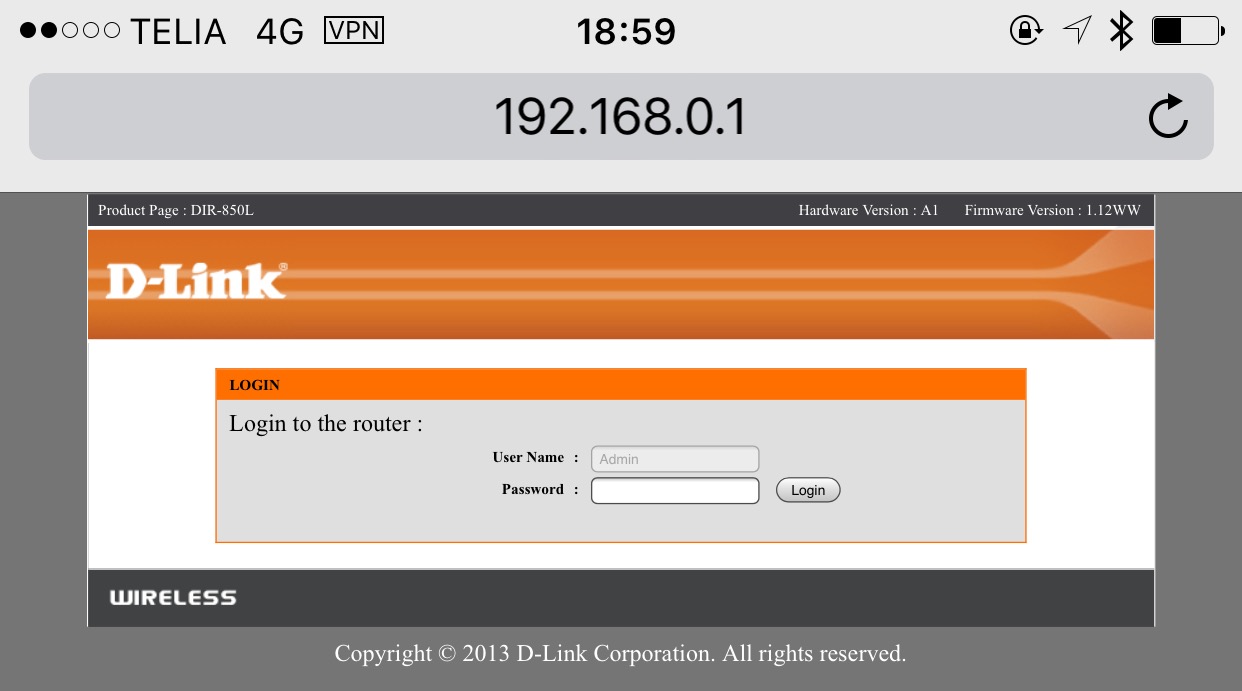
Iphone connected to 4G, over VPN, accessing a local IP to acess router configuration