How I Rip My DVDs & Blu-rays
Tue 26 Apr 2016, 00:00
Dec 2017: There is an updated version here: https://lambdan.se/207. I'll keep this old version around too though, for historical purposes, and because it has some screenshots and is somewhat more educational.
If you follow me on Twitter you know I talk a lot about ripping & transcoding my DVDs and Blu-rays. How do I do that exactly?
It has a few steps to it:
- "Rip out" the stuff I want from the discs into MKV files, without any compression
- Label the stuff so metadata scanners can properly identify them
- Decide on what quality to size ratio I want, and what other settings I want to use
- Transcode/compress the video to a more reasonable file size
Let's go through each one of the steps. But first, we have some tools to install!
Software used
All free!
- MakeMKV - used to rip your DVDs/blu-ray into uncompressed MakeMKV files. Available on Windows, OS X and Linux.
- Video Transcoding Scripts, especially
transcode-video, by Don Melton - used to transcode/compress the videos. To install on Windows, read this tutorial. - A good video player. I recommend MPC-HC on Windows and MPlayerX on OS X.
Optional: - Subtitle Edit - used to do a bunch of stuff with subtitles. Windows only. - Filebot - used to rename TV episodes nicer
Once you have set up all the software, you can continue!
1. Ripping
For ripping you will need a disk drive. If you only want to rip DVDs you probably already have one as disk drives that can read DVDs have been very standard for a long, long time. If you want to rip blu-rays you'll probably have to get a BD-ROM drive though. I use the ASUS BC-12D2HT, it's a internal SATA drive. If you're using a laptop or you just want a more portable option, there are USB drives as well. A BD-ROM drive goes for $60-$100.
While MakeMKV is in beta all it's functionality is free. Once it's out of beta Blu-ray ripping will cost money. DVDs will always be free.
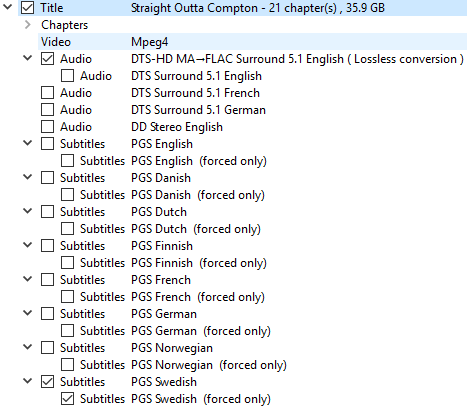
Once you have MakeMKV installed there are some settings you should change. Hit the wrench icon and go to the general tab and enable Expert Mode, this will cause the Advanced tab to appear. In the Advanced Tab you want to set Default Profile to FLAC. Why? Well, most blu-rays have their audio in a format called DTS-HD, which very few free programs can use. However, MakeMKV can convert this audio format to FLAC which almost all programs can use. If you don't use FLAC, your audio quality will be worse because it will force the programs reading the audio stream to only read the lossy core of it. Having MakeMKV convert it to FLAC will make sure all tools can read the audio stream in the highest quality.
Also head over to the Language tab and set your preferred language. If a subtitle track is available in this language on your discs MakeMKV will automatically select it. You can also change the output path in the Video tab. I have it to SemiAuto mode which will cause your videos to appear in a properly labeled subfolder in the folder you specify.
Once you have MakeMKV set up correctly, go ahead and insert a DVD or Blu-ray into your disk drive and hit the huge icon in MakeMKV. After opening the disc MakeMKV will present to you what it found on the disc. Depending on what you are ripping, a movie or a TV show, this will be very easy.
If you are ripping a movie go ahead and select the biggest title, most likely it will be the movie. To be sure you can also see it's length, and you should also expand it's tree and see what subtitles and audio tracks it have.
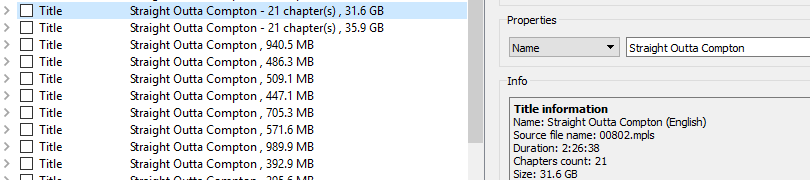
31.6 GB, 2 hours 30 minutes long. Yep this is probably the movie. The title below it is the directors cut!
If it has, say a Swedish subtitle track, and a English DTS-HD or English DD Surround 5.1 track you be pretty sure it is this title that is the movie.
DTS-HD Audio and a Swedish subtitle. Yep, this is most certainly the title I want.
The other titles on the disc will be gibberish, playlists, or special features such as behind the scenes material and such. Feel free to select which ones you want.
If you are ripping a TV show, things will get more complicated as most discs will have multiple episodes on it. For the most part you can follow the same steps as in selecting titles for a movie, but remember to select multiple titles! For example if the disc says it contains Episodes 1-12, make sure you have selected 12 titles.
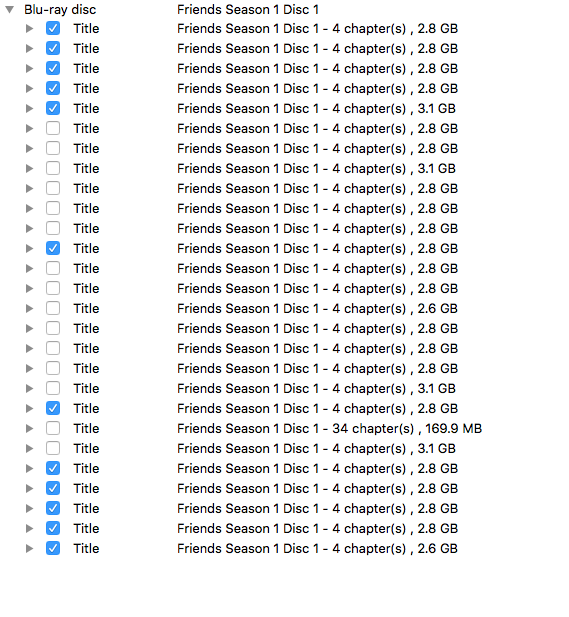
The Friends blu-rays have a really terrible Blu-ray structure. I had to go through each one of the titles and only select the ones that had a DD Surround 5.1 track and Swedish subtitles. All the other titles are gibberish, fake titles and other crap, just made to make your life worse.
Instead of determining by yourself what title is what, you could also try googling for the movie/TV show title and mpls, like 'friends bluray mpls'. Chances are someone has already done his research and shared his discoveries. Personally I don't trust this method though, as there might be multiple disc revisions and such.
Once you have selected the video titles you want, go ahead and let MakeMKV start the ripping. Depending on your drive speed it will take some time. Remember that a DVD is around 4-8 GB and a Blu-ray is around 30-40 GB, so make sure you have plenty of disk space!
When MakeMKV has finished you will find uncompressed MKV files in the folder specified. These are MKV files you can play in your favourite media player, such as MPC-HC. Feel free to do so and make sure it's what you wanted.
2. Labelling
At this point I like to label what I have ripped. If you use Plex, it will want your movies & TV episodes to be named in a certain way, which I find to be pretty sane.
If it's a movie it's very easy to label. Just name it title (year).mkv. For example, Straight Outta Compton (2015).mkv. You can find the year by looking at the back of the disk case, or just google the movie.
TV shows are harder though, depending on who made the blu-ray. HBO seems to very nice with their Game of Thrones blu-rays and has all episodes in order, i.e. the first video title is Episode 1, the second is Episode 2, and so on. But, Friends for instance, is not as nice. It has it's episodes scattered all over, in a seemingly random fashion. To label these episodes you need to do some research.
How I identify TV episodes:
- Open the video and jump to a arbitrary place in it
- Hear a sentence
- Google the sentence and you should find the script for this episode
- You should now know the episode. Go ahead and open up the show on TheTVDB and see what Season & Episode it is.
For example, I open up a Friends episode. I jump to a random spot in it and hear someone (Chandler) say "You don't get a lot of doy these days". I then google 'friends you dont get alot of doy these days', and the first result says it's Season 1, Episode 2:
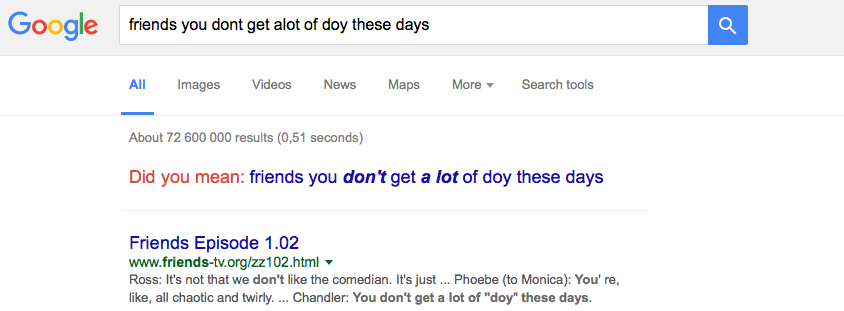
By googling a sentence you hear in a TV episode, you can very easily find out what episode it is.
Just to be mega sure I listen to another line and see if it's in the same script (by opening the page and Ctrl-F'ing for it).
As a final step I can also see on the page that had the script that they call the episode 'The One With The Sonogram At The End', so I look this episode up in Season 1 of Friends on TheTVDB and indeed it is Season 1 Episode 2 there as well.
I can now rename the video file to friends s01e02.mkv and that's one episode! Now just 235 to go.
Springfield! Springfield! has a lot of TV show scripts and is usually where I end up finding the scripts for my episodes. I found all the sentences I heard in Game of Thrones and Sopranos on there.
Ofcourse, just as you can google for someone who has already done the research on what titles to pick in MakeMKV, you can do the same here. Here is someone who identified what each title corresponded to which episode on the Friends Blu-rays. I could've saved myself a lot of time if I had found that, assuming it had the same structure as my disks, considering revisions and such again.
After you have identified and labelled all your rips, feel free to continue.
3. Deciding on settings
This is the hardest part, as it raises a lot of questions? Do I want as high quality as possible? Can I afford to use up the extra disk space? Where do I want the file to be played? How about compatibility? Burn-in subtitles or load them externally? What kind of audio do I want? What file extension should it end up in?
AV Quality
For quality, I want the video & audio to be better than most rips I find online, but I still want the file size to be reasonable. I think around 5-8 GB for a 1080p movie with 5.1 Surround audio is pretty sweet.
If you prioritize quality, and don't care about how big the file is, maybe the default 'big' preset is better for you. I think for most people the 'small' preset is sufficient. It's very similar to the quality you get from a digital movie you download from iTunes, Amazon, etc.
Don Melton's Video Transcoding Scripts make this very easy to accomplish. It has two "presets", --small and it's default (which used to be called --big). Small will use lower bitrates while the default (big) will use greater bitrates. As the bitrates tend to change from time to time, I recommend reading the README to see what bitrates they target. Don spends a lot of time tinkering with his presets and has done it for years so you can trust me when I say he know's his bitrate targets, and all the other parameters he passes to the encoder. He has been on multiple podcasts if you want to hear more about his adventures on the subject: Vector 22: Don Melton on transcoding video and Melton.
To accomplish the quality to file size ratio I want, I just use the --small preset. I will go into more detail on how to use the script in the next step.
There are certain cases though where I will not use --small and just use the --big/default option. --small tends to lose a lot of quality in very grainy material.
Audio
Melton's script handles audio very easily by default. If the input video has a surround track it will create two audio tracks in the output: An AC3 Surround track and an AAC Stereo track, to increase compatibility. You shouldn't really have to mess with anything related to the audio unless you want to. You can save some disk space by only having a surround track or by only having one surround track. I personally keep both as I want the Surround track when I am playing the video through my soundbar, and I want the Stereo track when I play it on my iPhone or iPad.
The bitrate of the audio output is determined by if you use --small or not. Read the README for Video Transcoding Scripts to see what the bitrates are. Sometimes it won't touch the audio track at all and just pass it through.
There is also the --small-video command which is like --small, except it will only affect the video.
UPDATE April 29th: I've started passing the parameter --audio-width 1=surround to make the output only have a single AC3 5.1 track. Even if you have a Stereo track Plex won't pick it, even if you're on a Stereo device, as it might be a audio commentary track. Therefore I've stopped having a Stereo track and just let Plex transcode AC3 5.1 down to Stereo when needed. Saves a tiny bit of space.
Subtitles
Subtitles is probably the biggest pain in the ass when ripping your own collection. There are two types of subtitles: plain-text and bitmaps.
If you have ever downloaded a video from online, you might've got a .srt with it, or maybe you downloaded a video and needed subtitles so you found a .srt file with your language. .srt files are basically just .txt files that have a bunch of time codes and translated lines in them. They are very small and portable.
If you play your media back through Plex, especially on Apple devices, I really recommend plain-text based subtitles as Plex can use iOS native subtitle APIs.
Bitmap based subtitles, such as PGS or VOBSUB, are what is standard on most, if not all, Blu-rays and DVDs. These are literally images with the text, and not widely compatible. One big pro bitmap based subtitles have is that it can use specific positioning, such as on top of the screen or in the middle (Plain-text .srt files will only be shown at the bottom as they don't have any metadata that says where they should be placed). One big negative with bitmap based subtitles is that you cannot change the appearance of them; you cannot change their font or color, you simply have to hope the company that produced the Blu-ray picked a good font and suitable color that is easily legible.
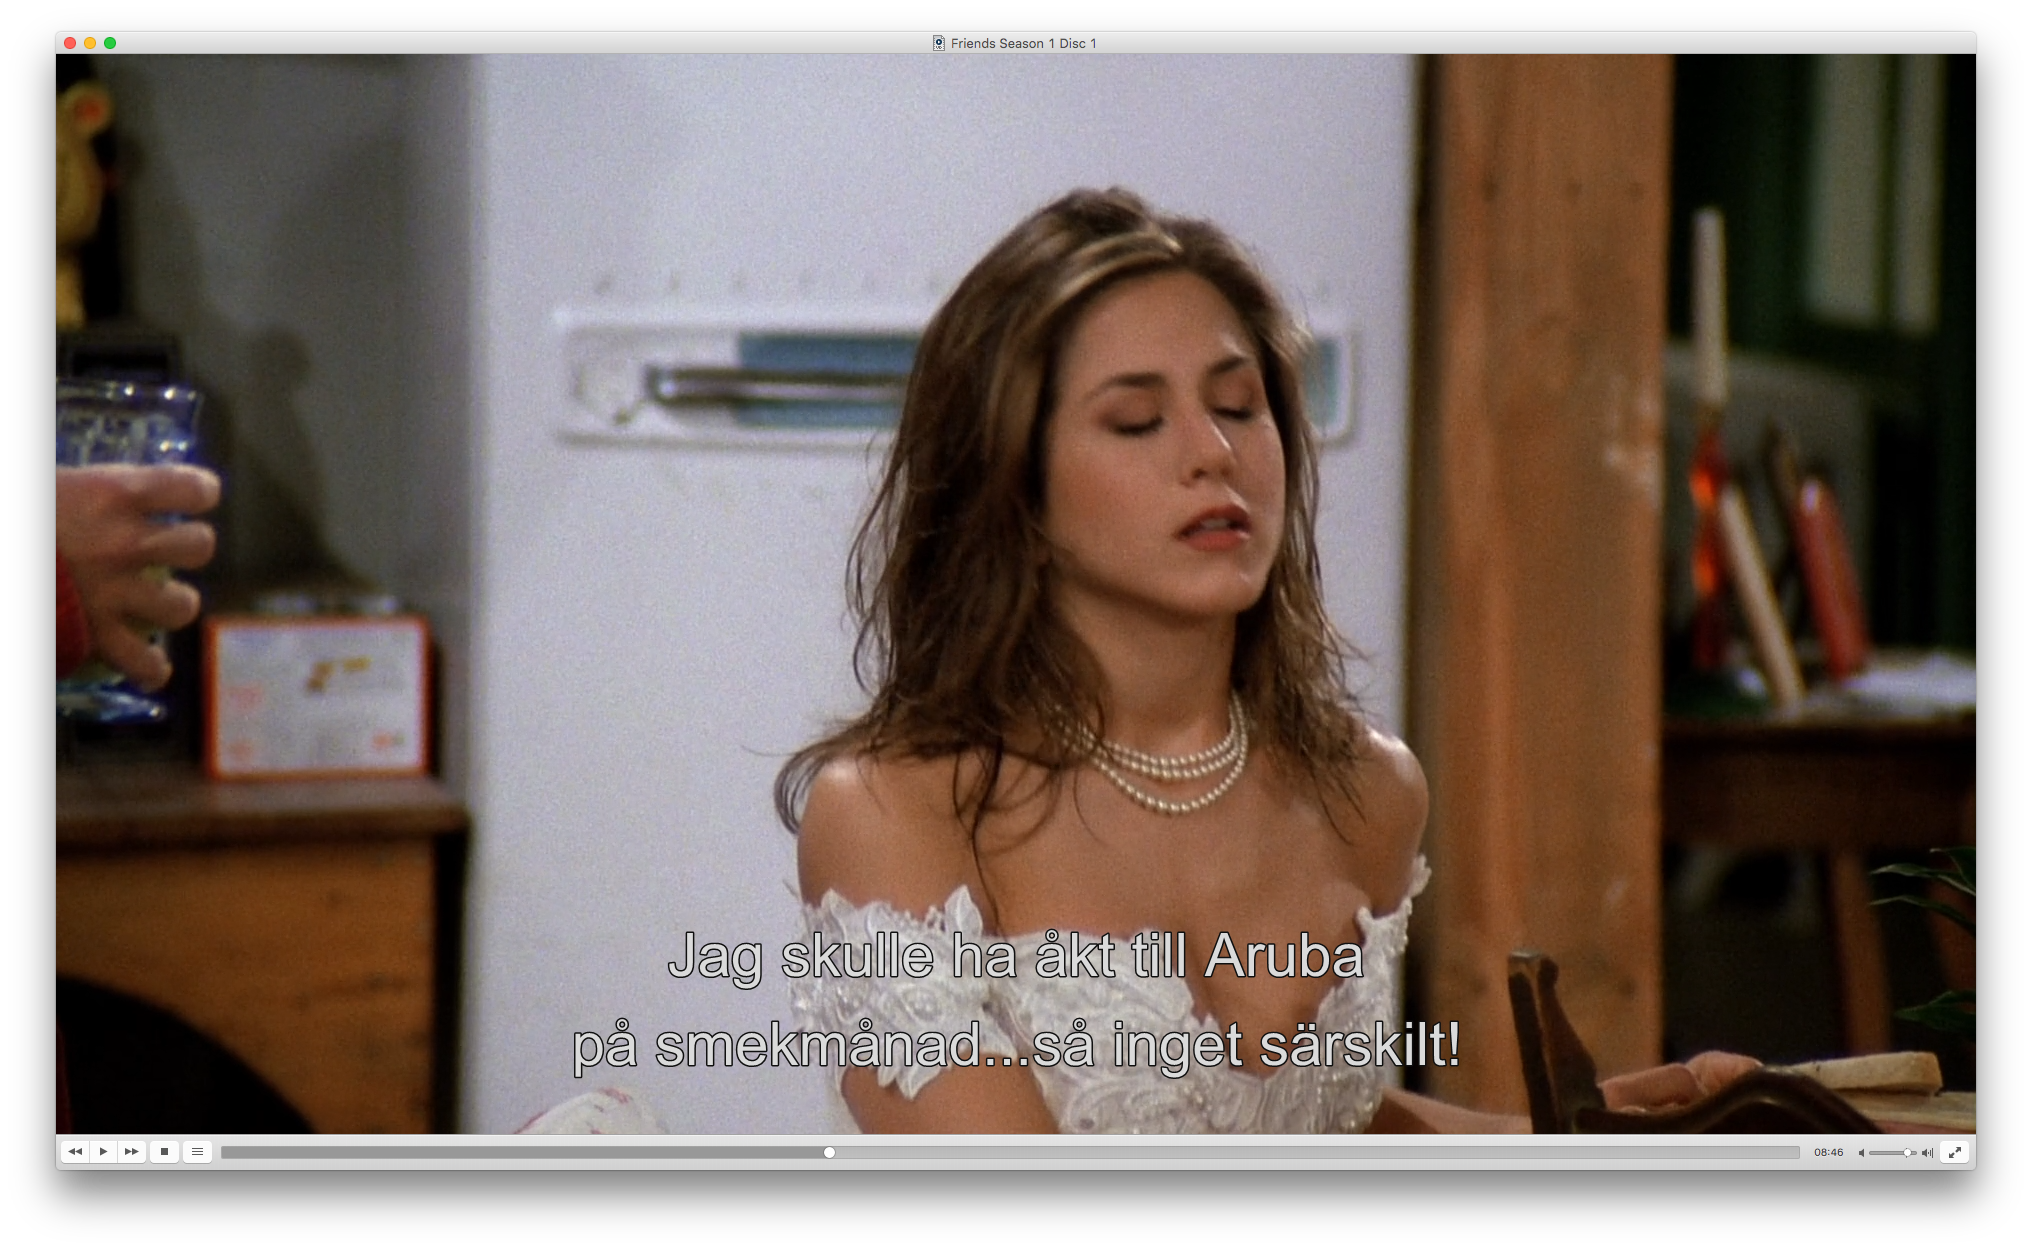
The bitmap based font used on the Friends blu-rays is white and thin and not very legible on a white background.

Using plain-text .srt subtitles, you can style them as you want, and make them more legible.
While bitmap based subtitles are compatible in MPC-HC and such, they are not compatible on most devices. As these kind of subtitles are literally images, they also take up more space, compared to plain text.
If you use Plex to playback your media you can use both, but I would still much, much prefer .srt files as Plex can integrate them more nicely. If you use Plex on the Apple TV 4, it can use Apple TV's native subtitle output to show them. If you use bitmap based subtitles on your Apple TV they won't work at all, Plex has to transcode them in on the fly which takes time and will prevent you from smoothly fast-forwarding and rewinding.
So what options do you have?
Burning in
By passing --burn-subtitle x, where x is the track ID of the subtitle, to transcode-video you can burn in the subtitle. This means it will always be there, watermarked on the video. This has it's ups and downs. It has the greatest compatibility as your player won't have to care at all about rendering any subtitles, but on the other hand, the subtitle will always be there, no way to disable it.
Passthrough
You can simply just passthrough the subtitle track to the video. Doing this, your player must take it upon itself to render it. A lot of players will support plain-text/.srt, very few will do bitmap based.
You can use --add-subtitle x, to passthrough a subtitle in transcode-video or --add-srt path to include a .srt. An alternative to that, which I think is much better, is to not add the subtitle using transcode-video and instead label the subtitle the same as the videofile, and put it in the same folder. So for example you would have a video called Friends S01E01.mkv and a .srt file called Friends S01E01.swe.srt (the .swe part is optional but it shows up as Swedish subtitle in Plex and other players then.)
You can also do this with Bitmap based subtitles if you extract them out from the MKV into .sub & .idx files.
Downloading subtitles from the Internet
Sites like OpenSubtitles have a lot of subtitles in a variety of language. If you're lucky the subtitle you're looking for might be there, and hopefully it will be synced to your video. If it isn't you have to re-sync it. It is also possible some amateur have translated them so they might not be grammatically correct.
Converting bitmap to plain-text
Using Subtitle Edit, it is possible to throw a bitmap based subtitle into it and have it try to convert it to plain-text, using OCR. This process is very tedious, time consuming and prone to errors. It might mistake O for 0 or o, and I for l and so on. However, if you take your time you might end up with a great result! The more you use Subtitle Edit it's OCR Replace List and your User Dictionary will get bigger and smarter.

Converting a bitmap based subtitle to plain-text using OCR is prone to a lot of errors. Here you can see it identifying 'nog.' as 'H09-'.
What I Do
I used to just burn in the subtitle. It is the easiest way. But it has it flaws. As you can see in the screenshots of Friends above, they might use a bad font which make them hard to read during certain situations.
So what I started doing is that I put both the bitmap based subtitle, and either download a .srt from OpenSubtitles, if available in Swedish, or OCR scan it in Subtitle Edit to make my own .srt, and also store that in the same folder with the same name as the video.
This way I have a very portable subtitle that can be displayed natively on many devices, and if the .srt isn't any good, I can always fall back to the bitmap based one. Only down side of this is that bitmap subtitles are pretty big as mentioned before. They are roughly 5 MB for a episode of Friends, which means that I waste around 1.2 GB on subtitles for one show that I might not even use (I pick the .srt version 99% of the time and the subtitles are 99% fine.)
If I notice a error in the .srt that I made from OCR scanning it doesn't take long to go edit out the mistake in the .srt file (as they are plain text.) If it's a error that seems to be present in a bunch of episodes, I make a script to batch edit the mistake. For example, for all my Friends episodes I noticed it had OCR scanned Hej... into Hej-. So I made a script that replaced Hej- with Hej... on all the .srt files.
Once you have decided on what settings you are gonna use, you can start transcoding!
4. Transcoding
As transcode-video is a command-line tool, you will need to open up a Terminal or a Command Prompt.
The basic usage of transcode-video is transcode-video [OPTIONS] [FILE]. For example: transcode-video --burn-subtitle 1 --small /path/to/video.mkv. This would use the small preset, and burn in the first subtitle track.
transcode-video has a very useful --help command built-in where you can see everything it can do. Here are my favorites:
--output /some/folder/- output the video to/some/folder/video.mkv. Default is the working directory.--small- reduces bitrates to get a smaller file size, at the cost of some quality--burn-subtitle x- burns in subtitle track x--crop detect- automatically crops black borders. You can also use--crop T:B:L:Rto manually specify. Video Transcoding Scripts also comes with the tooldetect-cropwhich you can use to determine crop values in advance, and lets you preview them.--audio-width all=stereo- all audio tracks in the output will be stereo. Default isdouble, one surround and one stereo.--720p- set 1280x720 as the maximum output resolution--quick- makes transcoding faster, but file size will be bigger--mp4- set output to be in mp4 format. mkv is default.
If you're encoding a bunch of TV episodes I like to set up a script that will loop through each file and run the script:
#!/bin/bash

for f in *.mkv
do
   transcode-video --audio-width 1=surround "$f" --output /Volumes/Green/transcodes/
done
The README for Video Transcoding Scripts also contains information on what these commands do, so be sure to read that as well!
Speed
Transcoding will take time. Standard definition stuff as DVDs are pretty fast, even on older computer, but HD content will take long, especially if it has a lot of grain and such. Encoding a 20 minute episode of Friends in 1080p takes roughly 20 minutes for my i7 4770K. I've tried on my Mac Mini with a i5 and it takes 6 times as long compared to my i7.
Once transcoding is done, your video is done! Try opening it in your video player and see if it looks good enough. It should. If you use Plex, put it in the folder with your Movies/TV-shows and update your Library to let Plex find it.
You can now remove the uncompressed MKV you got from MakeMKV if you want. Personally I keep them around as long as I don't run out of disk space. I don't want to go through steps 1 & 2 all over again.
Closure
So why would you go through all this hassle?
- You get better quality than most rips you find online
- You get better quality than what airs on TV/Netflix/other streaming services
- You get definitively synced subtitles (if you take them from the disc)
- You support the people behind the movie/TV-show by buying the DVD/Blu-ray
- You get a nice case to put on your shelf
- It's fun! (...maybe that's just me)